If you are new to Facebook Advertising, then one of the first steps to getting the most out of your Facebook Ad account is to install a Facebook pixel onto your website.
What is a Facebook Pixel?
A Facebook pixel is a small piece of code that Facebook gives you to insert at the top of each page of your website. When visitors open your website, the pixel will send bits of information to your Facebook Business Account so you can monitor visitor interactions with your website.
Importantly, your Facebook pixel will track visitors who come from Facebook pages to your website. Because Facebook knows who these visitors are, Facebook Ads allows you to specifically target these visitors with clever re-marketing campaigns. This lets you advertise directly to people who have already interacted with your website, and might have expressed initial interest in your product or service, but need more online “prodding” to actually make a purchase.
The power of the pixel is what drives a lot of the “wow” factor in Facebook digital marketing. For the small business owner who is doing all the marketing themselves, installing the Facebook pixel is the first crucial step towards getting the most out of their social media advertising budget.
Why Keeping Data Sources Pure Is So Important
The data you receive from your Facebook pixel is powerful. Knowing the demographic profile and interests of people who have visited your website allows you to refine your targeting so you have the best possible chance of reaching people that are most likely to make a purchase.
Imagine, however, if your pixel was “hijacked” and installed on porn sites or junk sites that have nothing to do with your business? Visitors to those other sites would be tracked by your pixel, and your business account with Facebook will include all those other visitors of those other sites in your Facebook account data. All the hard work of tracking visitors to your website would go to waste in an instant as the integrity of your data would be compromised with profiles of visitors that have zero interest in your business.
How To Tell If Your Facebook Pixel Has Been Hijacked
Unfortunately, pixel hijacking occurs often. This is because when your pixel is installed, your pixel is immediately exposed to the public. Anyone can copy and paste it into another website without your permission.
You can tell whether or not other unauthorized websites are using your pixel by going to your Events Manager in your Facebook Business account, and inspecting the data sources for your pixel.
On the right hand panel of your Events Manager you will see the number of websites that are using your pixel. If that number exceeds the number of websites that you control, then your pixel has been hijacked.
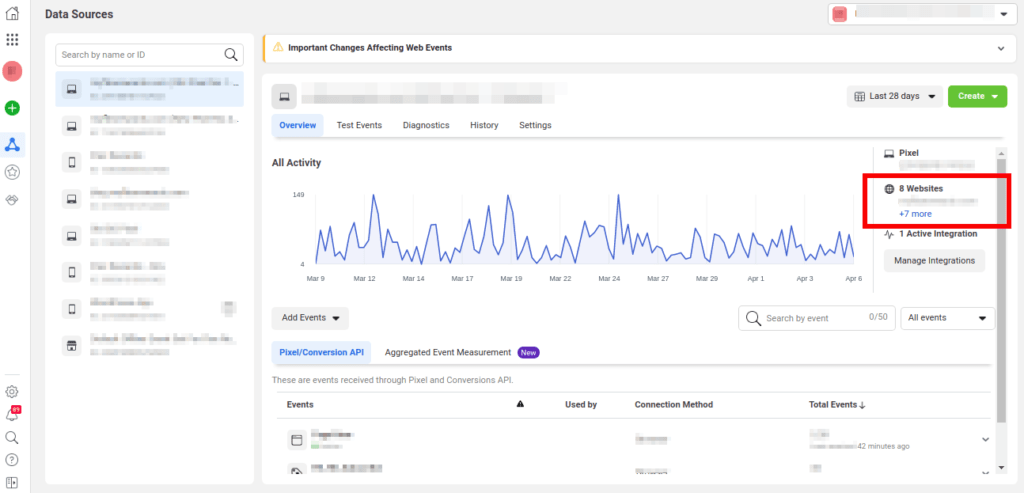
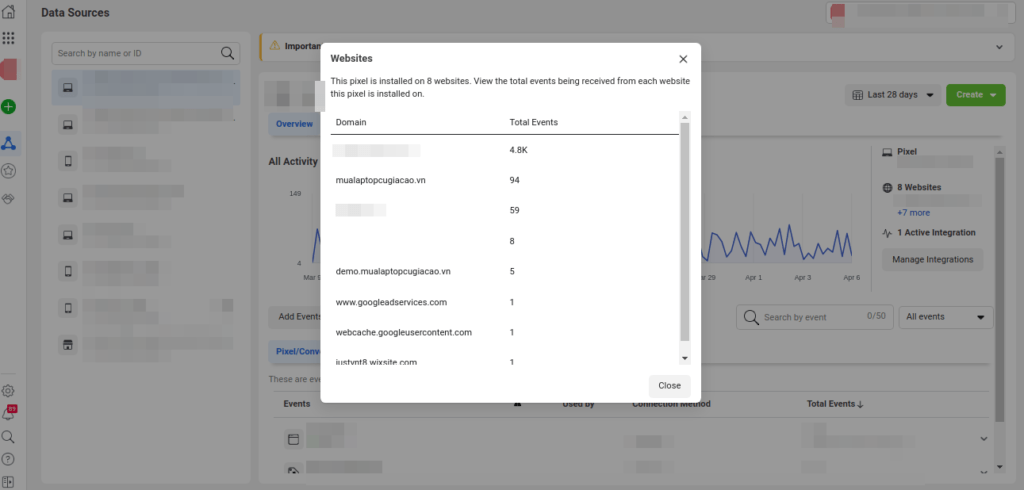
You can view each of the unauthorized websites by clicking on the link. A modal will open showing you each website that has installed your pixel.
How to Stop Your Pixel Sending Data From Unauthorized Websites
There’s good news and there’s bad news.
The bad news is that if your data sources have been compromised by pixel installations on unauthorized websites, then unfortunately, there’s no way to filter out the bad data from your historical data sources. You’ll need to create a new pixel and re-install it on your website.
The good news is that there is an easy way to prevent your pixel from sending data from unauthorized websites. Once your new pixel has been installed on your website, go to the “Settings” tab on your Events Manager for your pixel, and scroll down to the section “Traffic Permissions”.
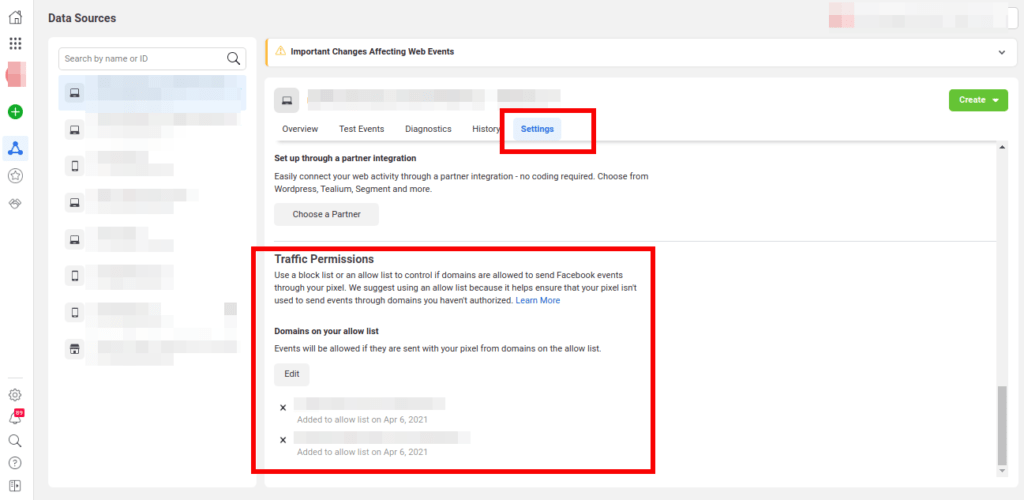
Here, in “Traffic Permissions” you can create either a “Block List” to specifically exclude data from specific unauthorized websites, or you can create an “Allow List” to tell Facebook to only record data from pixels on websites that you specifically designate. In most cases, it will be easier for you to list your authorized websites in an Allow List. Listing your primary domain in your Allow List will also automatically include any subdomains that you have.
Pixel “Power To the People”
Facebook pixels add a powerful dimension to your ability to reach a specific audience through re-marketing campaigns. Setting up your pixel correctly to keep your data sources “pure” is an important initial step on the journey to mastering digital advertising.
If you are a Flex Rewards merchant, our team of digital marketing consultants can help you install pixels on your website and coach you how to run re-marketing campaigns effectively. Join the Flex Rewards community and we’ll make sure you don’t make costly mistakes that can be easily avoided!


